BONJOUR
It's been a long time since I made a new article, I had a new freelance mission from March to September
So, if you are reading this, it's either because you are curious about what I did during September to November 2023 or you are my mum ( the only person interested in my posts)
Context
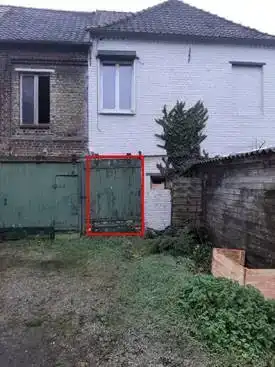
My house is the white one, the bottom (red square) belongs to the abandoned house. I don't know why/when they split it, I just bought it like this ...
I recently met people that visited the house before us, and they didn't buy it as they considered this as a red flag
The problem was the common part (roof) from the haunted house was really bad, you could see the wood of my 1st floor because of the holes
 This led to have nice clim during summer, and terrible cold during winter
At worst, we had 11° in the house and 3° at the floor level ...
So I contacted the owner ( a realestate company ) to see if I could buy the abandoned house but for historic reason I was able to only obtain the red-square part
It took only 2 years ! Finding a falicitator for geometry / notary / real-estate / contacting neighbours...
As a total noob in using my hands somewhere else than a keyboard, I will be accompanied by my father during the process. All the decisions were made based on his experience and civil engineering ref I could find on internet
Start
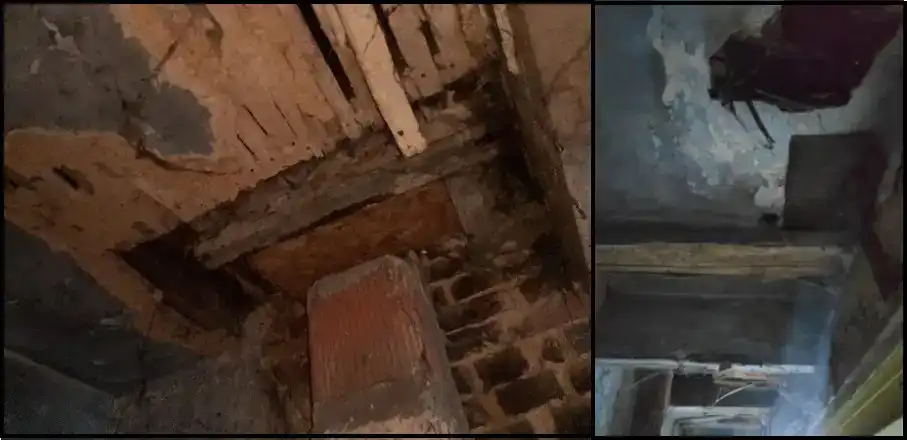
ceiling
Note at this step I was uncertain I could buy the small-part, they just agreed to let me put isolation on the ceiling to fight the winter
- remove the cob, wood and nails
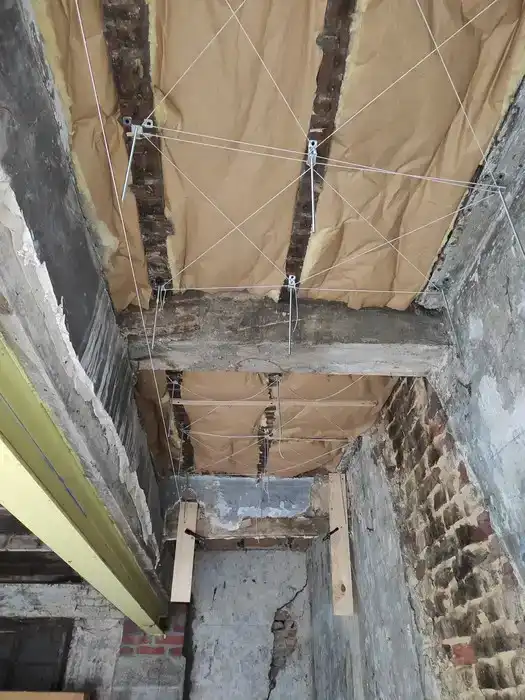
- put fixations at the same levels using the laser
- first, 20cm of glass wool
- tie with rope
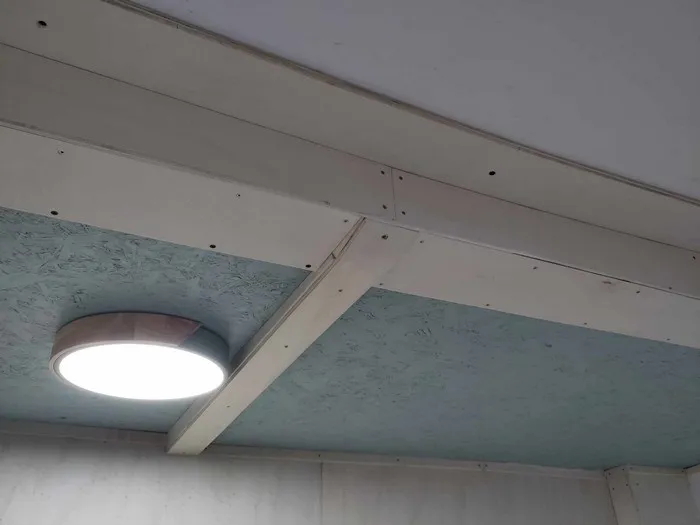
- put aluminium rail to accept ceiling
- add another big 40cm of wood wool
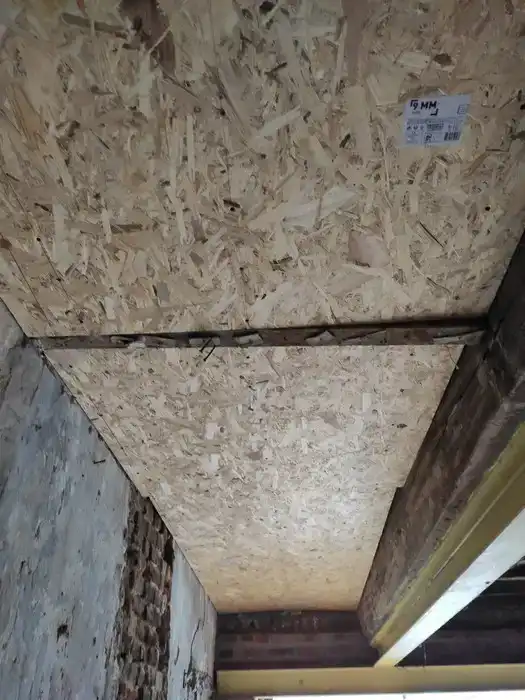
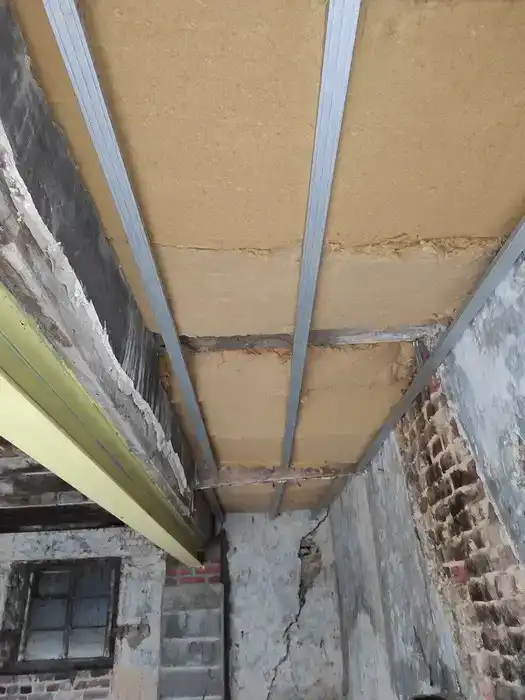
- put OBS to proctect the job done
notes
- I choosed wood wool for ecological reason, it was horrible to cut. You have to compress the area with clamp and saw carrefully to cut the wool. The material is rigid and really hard to place behind the rails. It also spread a lot of particules, great for your lungs
- I used a plate lifter for the obs, I have no idea how it is possible to do without it
the wall
After 2 years of negociating, we had an agreement with the owner ! Fantastic ! The condition was to build a wall of separation between my new little area and the abandoned house.
To proove that I'm wiling to do it, they just want a paper with an estimation of a mason
Problem : absolutely nobody want to do the job, it's too small for them.
So let's see how to do a nice wall
For the foundation
- I dug 50cm
- placed a thin layer of concrete
- first 2 rows of concrete block
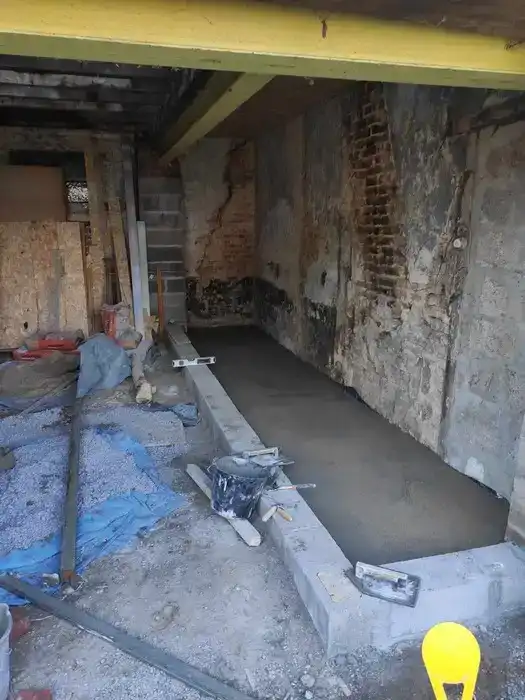
once I put the 2nd row, I made the floor before the wall would be too tall, I did my best to make it at the same level of my current house

Then each week, add 3 rows of concretes, and let it dry for the next week

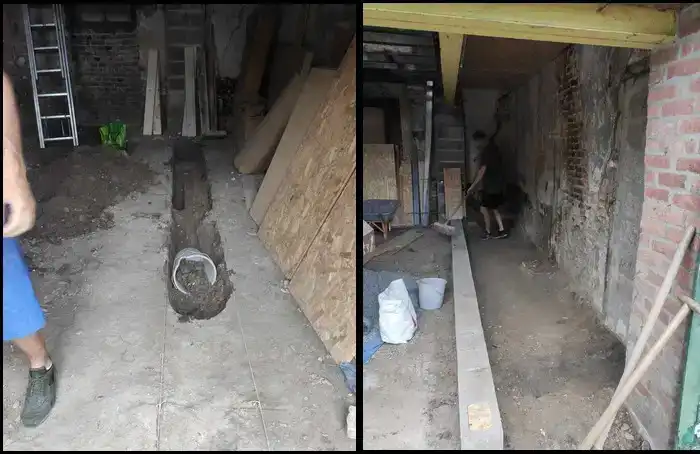
now the wall is too high to access the oposite side, I need to dig an access from inside my house.
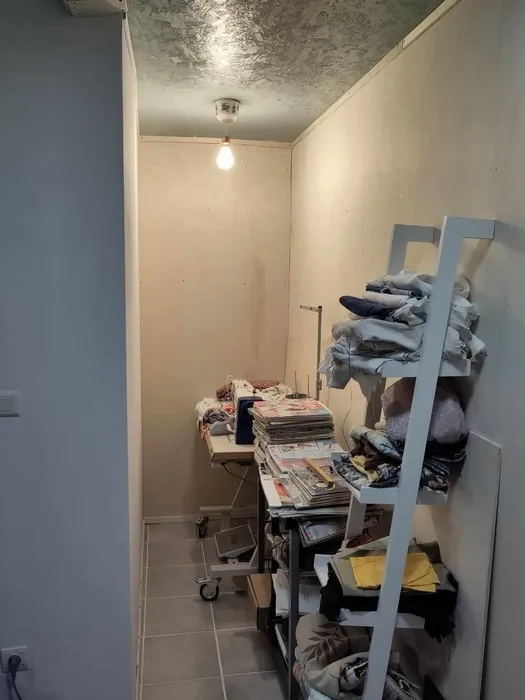
It needs to be tight because this is the sewing workshop of my wife ...
notes
-
we used a rope to ensure the wall is straight, the concrete block needs to be placed above the rope so it has to be placed with fingertip
-
at the begining, the pain was in the back because of the low working position
-
at the middle, in the fingers because "you need to put the concrete above the rope and above all DONT TOUCH THE ROPES STUPID SON"
-
at the end, in both because of the impossible position
It was definitly the most physical part, not enjoyable, I would not recomend it
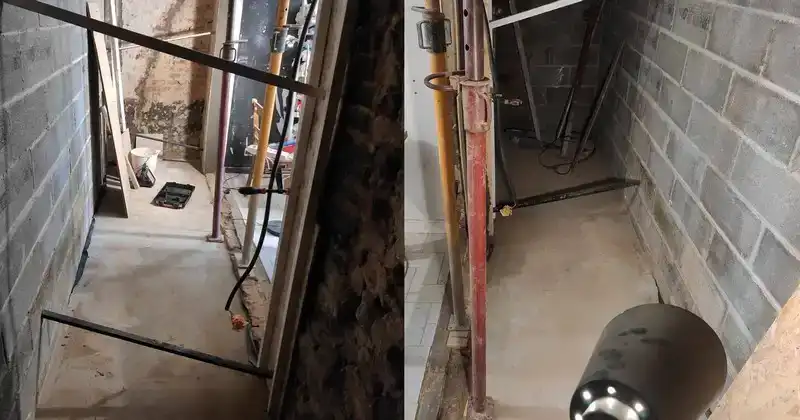
inside
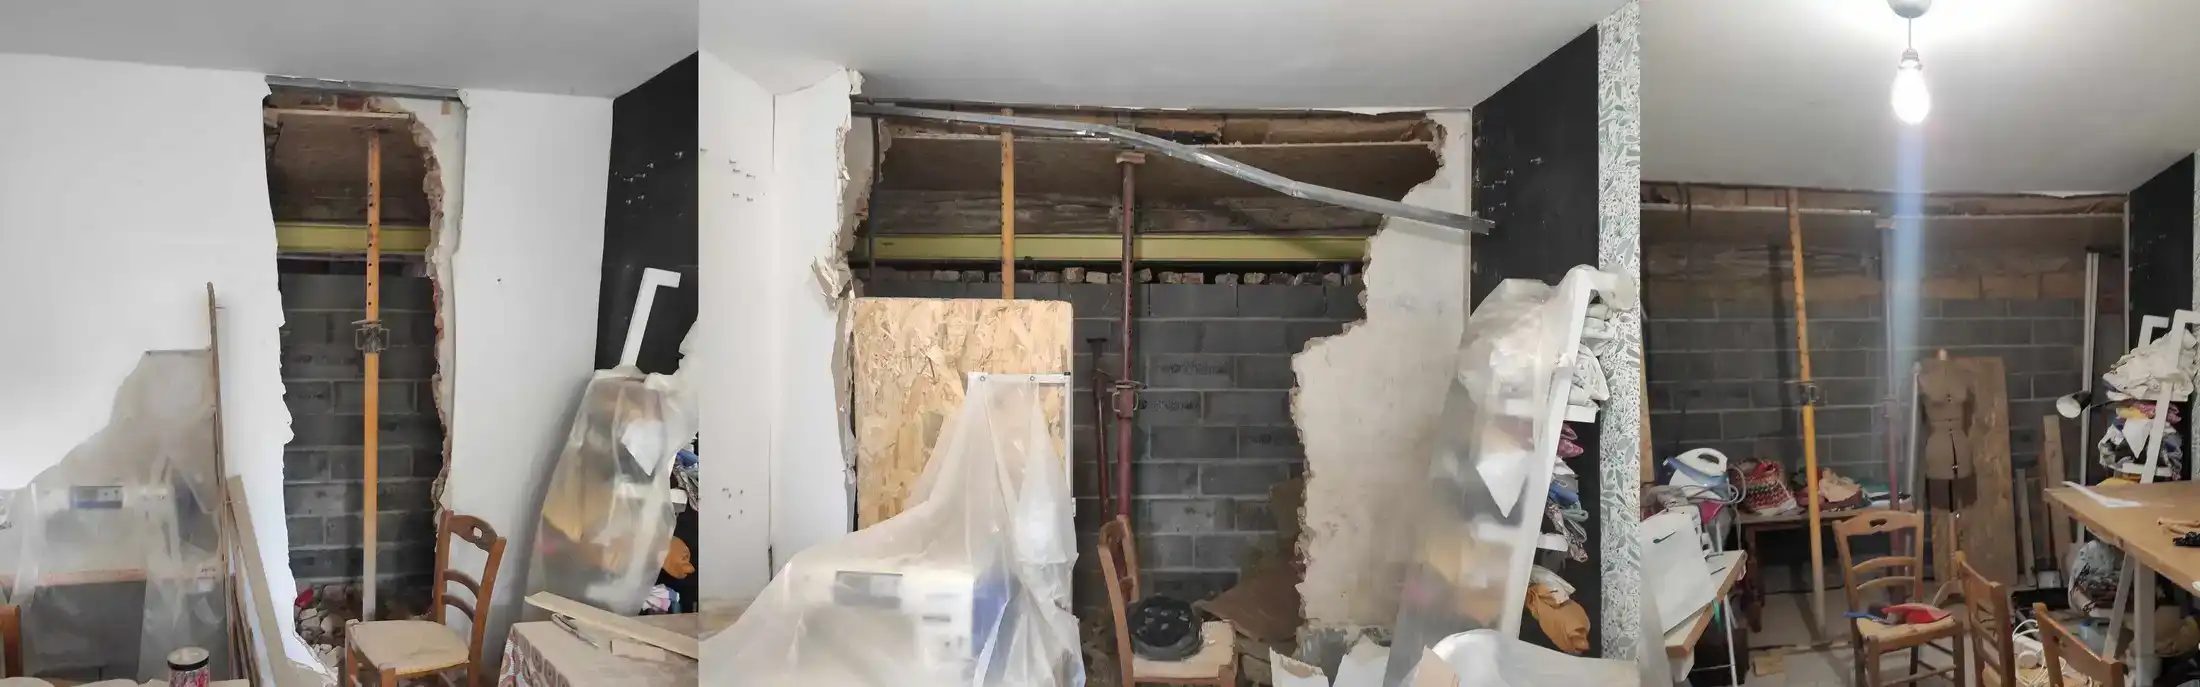
- finish to open the wall
- throw all the red bricks on the other side ( you can see on the 2nd picture the wall was not totally closed)
- even if it was not a "bearer wall" , with old house it can become "semi-bearer", I put some props for safety and will add a wooden beam for peace of mind
- even the new edges with cement
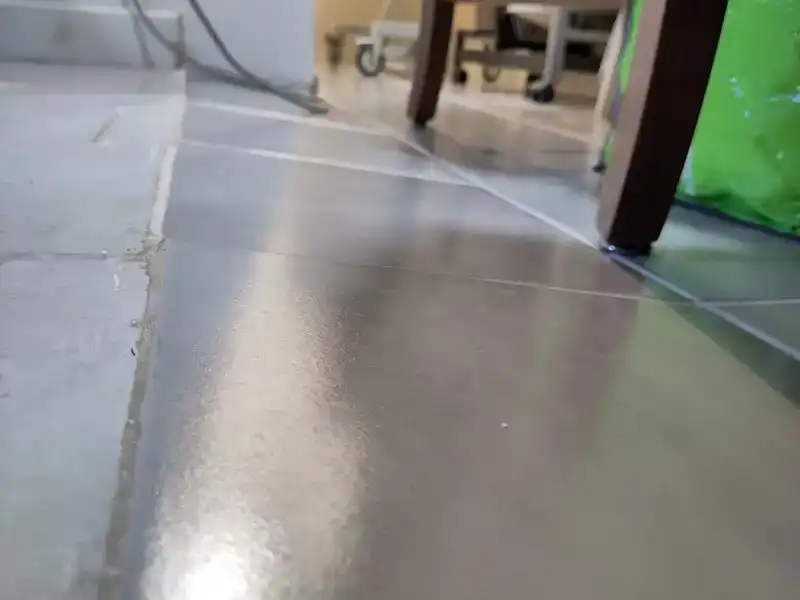
I found second-hand grey tiles for only 3€/square² , thanks again to my little sister that drove me to get them
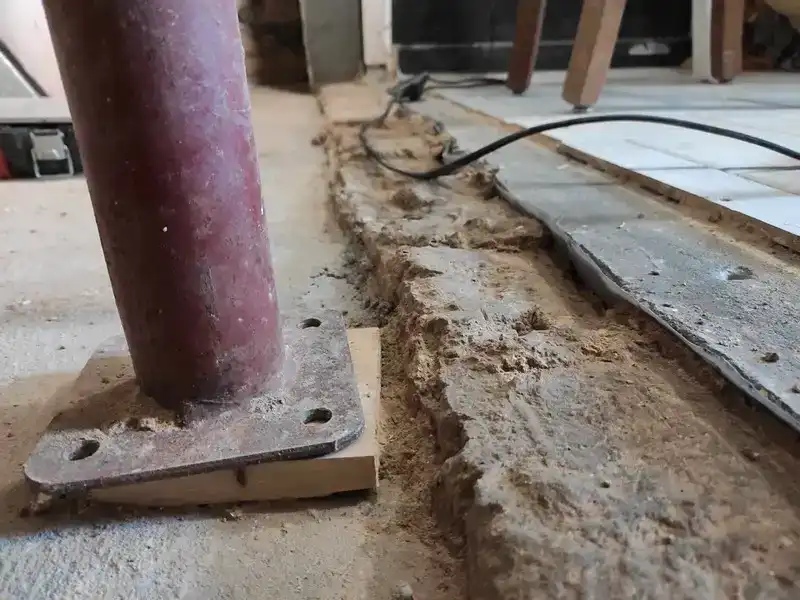
there was still a big difference of level between the house and the new space ... I did the smoothest slope I could
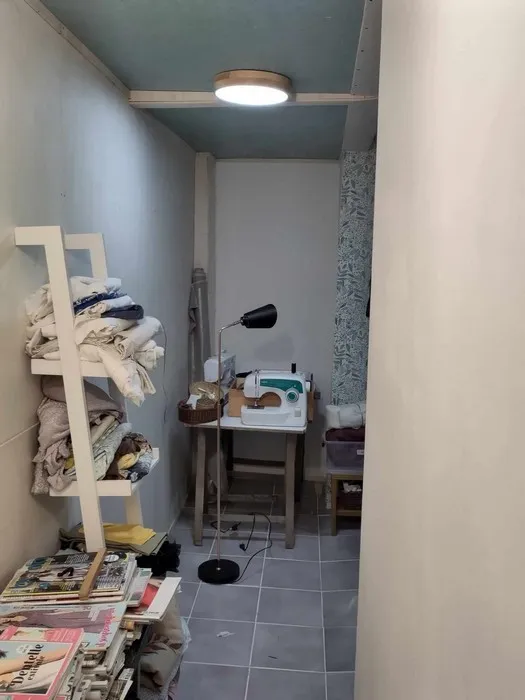
at this step, I'm sad to say the smartphone of my wife died ( my wife is still alive, even sadder) ... with all the last pictures I took
please use your imagination for the rest
- add wood structure
- insert 4cm of wood wool inside part( sound isolation ) and 20cm for the little part that is exposed to outside
- apply plywood pannel
- add placo for the part too damaged to set wood
- make the skirting board for top & bottom (I used the leftover of plywood and a bosh flusher)
- set up electricity
result
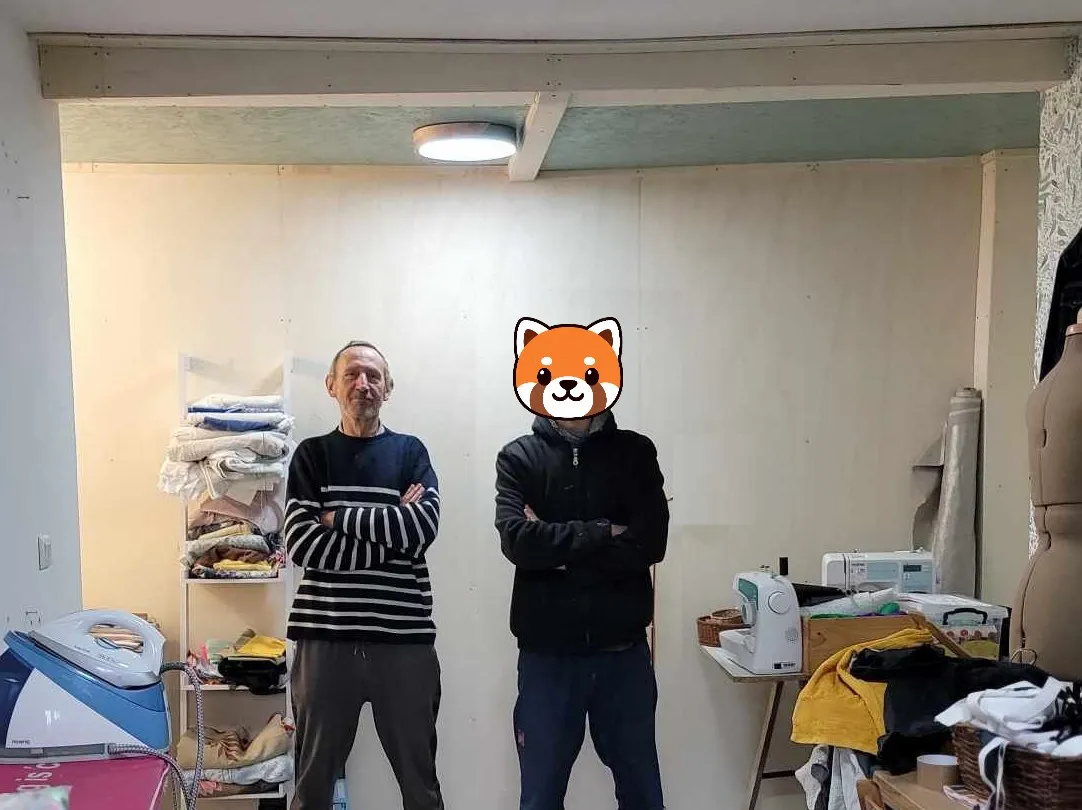
My father woke up nearly everyday with me, 6am to walk the dog and 7am at my house ready to sweat
He was involved in every steps I showed you and much more I didn't show like moving 100 concrete blocks, picking and throwing waste at the recycling center, finding fantastic cheap wood at 120km, bringing all his personal items etc etc ...
He is 65 years old but has the strenght of an ape
Thank you for showing and teaching me how to advance, also for forcing me to go back to school so I have a job on a chair ...